Air Conditioner Blowing Only Air but Not Cooling? Here’s How to Fix It Without Calling a Technician
Tips 25/11/2025 23:26
Don’t throw away sprouted potatoes! Those little green shoots are a perfect opportunity to grow your own potatoes at home. With just a few simple steps, you can turn these sprouted tubers into a productive potato crop that provides fresh potatoes all year long.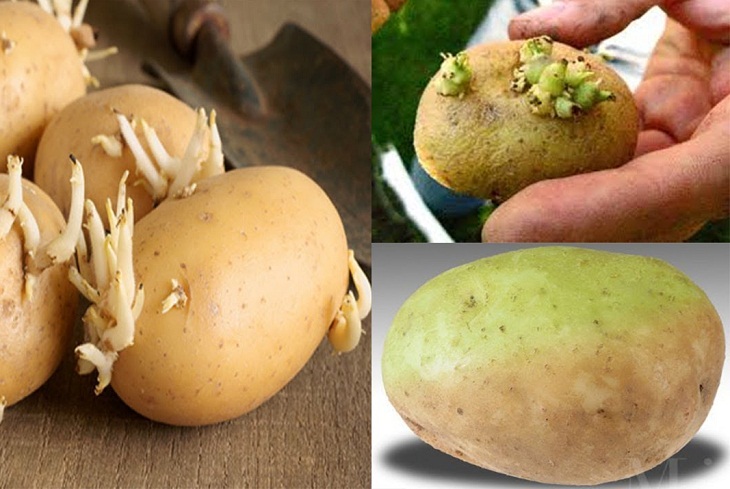
Before planting, gather the necessary supplies:
Soil: Choose light, loose, well-draining soil such as sandy loam, light clay, or fertile alluvial soil. It should retain moisture but not become waterlogged.
Seed Potatoes: Use tubers that weigh at least 50 grams and are over 4.5 cm in diameter. You can plant whole potatoes or cut them into pieces with at least one sprout per piece. Cutting is often preferred by farmers to save seed potatoes and reduce costs.
If you cut the tubers, dust the cut surfaces with dry cement or wood ash to prevent rot, especially if rain is expected.
Whole potatoes are easier for beginners to handle and have a lower risk of fungal infections.
Containers: Pots, buckets, or even repurposed paint cans can be used. Make sure there are drainage holes at the bottom.
Light and Air: Potatoes need a bright, airy location with good airflow. Ensure the soil is nutrient-rich, well-draining, and maintained at proper moisture levels.
Prepare your container with drainage holes.
When potato sprouts reach 2–3 cm, plant the tuber 10–15 cm deep in the soil, covering sprouts with about 2–3 cm of soil.
Space tubers appropriately to allow room for growth. For example, plant 5–6 tubers per 1 m² with 25–30 cm between them.
Keep the soil consistently moist. Within 10–15 days, sprouts should begin emerging evenly from the soil.
Tip: Avoid overwatering, which can cause rot. The soil should feel damp but not soggy.
Once your potato plants start growing vigorously, they require regular attention to thrive and produce a healthy yield.
When plants reach 15–20 cm in height (usually 7–10 days after sprouting), gently loosen the soil and remove weeds.
Apply a first round of fertilizer to the base of the plants or the space between rows—never directly on the stems, as it may damage the plant.
Prune excess sprouts, leaving only 2–3 main stems per tuber to promote strong growth.
About 15–20 days after the first session, water the plants again.
Loosen the soil and remove weeds, then mound the soil around the plants to form ridges. This ensures the developing tubers are fully covered, preventing green spots or premature sprouting above ground.
Each clump should have 4–5 main stems. If you are growing for seed potatoes, you can leave more stems.
Tip: Regular watering and proper soil management are essential. Potatoes grow best in cool, moist conditions that allow roots to absorb water and convert nutrients into starch.
When plants reach 50–60 cm in height, supplement with organic fertilizer around the base to boost tuber formation and increase resilience against cold or pests.
Flowering is a sign that the plants are mature. Potato flowers may be white, pink, red, blue, or purple with yellow centers. Pollination is mostly done by insects such as bees and wasps.
Some varieties may produce green fruit that resembles cherry tomatoes; these contain toxic alkaloids like solanine and should not be eaten.
Harvesting Tips:
About two weeks before harvest, reduce watering to allow the soil to dry slightly.
To harvest, simply tip the container and carefully collect the potatoes from the soil.
Handle tubers gently to avoid bruising, which can lead to rot during storage.
Storage: Keep harvested potatoes in a cool, dark, well-ventilated space. Properly stored potatoes can last several months.
Continuous Planting: You can plant new seed potatoes every few months to ensure a steady supply throughout the year.
Pest Management: Inspect plants regularly for pests such as aphids or potato beetles. Organic remedies, such as neem oil, can help control infestations.
Companion Planting: Planting potatoes alongside beans or corn can improve soil health and reduce pest pressure.
By following these simple steps, even beginners can successfully grow potatoes at home using sprouted tubers. With patience and proper care, you can enjoy fresh, homegrown potatoes all year long—delicious, nutritious, and free from chemical residues.