Ginger bought home will wilt and sprout after a few days, use this immediately and it will still be fresh and delicious for half a year!
Tips 10/12/2025 14:28
Watermelon is a nutritious fruit rich in vitamins, minerals, and antioxidants that support overall health. Juicy, sweet, and refreshing, it is one of the most popular fruits worldwide. Because watermelon is a fast-growing vine that thrives in warm, humid climates, it can be successfully grown at home—even by beginners.
If you want to grow watermelons from seeds with proper technique, minimal effort, and high productivity, follow the step-by-step guide below.
There are many watermelon varieties available around the world, differing in shape, size, flavor, and whether they contain seeds. Some common types include:
Round varieties: Ice Box, Sugar Baby
Oval varieties: Congo, Charleston Grey, Jubilee
When planting at home, many people prefer Sugar Baby because it grows quickly, produces compact fruits, and adapts well to containers.
Watermelons typically have two main growing seasons each year:
Winter–Spring season:
Plant from October to December. If you want fruit ready for the Lunar New Year, begin planting around November.
Spring–Summer season:
Plant from February to April.
Although these are ideal periods, watermelons can still grow outside these months as long as temperatures remain warm and sunlight is sufficient.
Watermelons love full sunlight, good air circulation, and ample space for vines to spread. Choose an area that receives sunlight for at least 6–8 hours per day.
Avoid cramped, humid, or shaded spots, as these conditions can lead to poor fruit development and increased risk of diseases.
Watermelons grow best in loose, fertile, well-draining soil.
Ideal soil conditions include:
Rich in organic matter
Good moisture retention but not waterlogged
pH level between 6.0 and 6.8
If planting in containers or foam boxes, make sure to drill drainage holes to prevent root rot. Adding compost, coconut coir, or sand can improve soil texture and drainage.
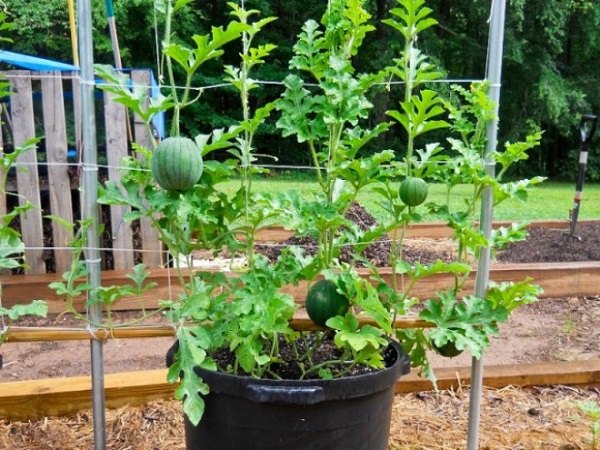
Growing watermelons in pots is perfect for homes with limited outdoor space. With proper care, container-grown watermelons can still produce delicious, high-quality fruits.
Watermelons develop a strong root system, so choose a pot that is:
Large and deep (at least 40–50 cm in diameter)
Equipped with drainage holes
Filled with nutrient-rich soil
Larger pots encourage better root growth and help the plant produce bigger, sweeter fruits.
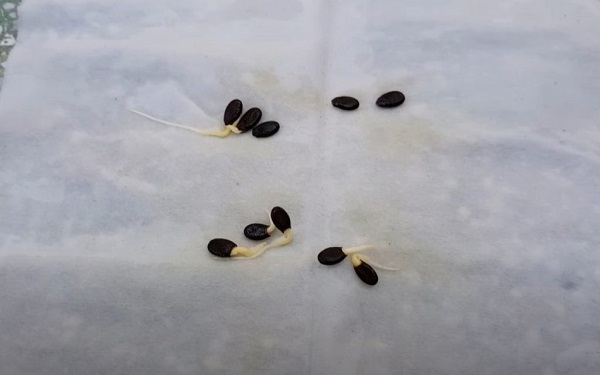
Before planting, you must pre-germinate the seeds:
Sun-dry the seeds for 1–2 hours.
Soak them in warm water for 3–4 hours.
Remove and pat them dry.
Wrap the seeds in a moist cloth and place them inside rice husk or straw to maintain warmth.
Keep the cloth lightly moistened. Within 3 days, the seeds will sprout.
Transfer sprouted seeds into nursery pots. After 2 weeks, when the seedlings have several small leaves, move them to the large planting pot.
This method helps ensure faster growth and higher germination success.
After transplanting, water the plant twice daily (morning and late afternoon).
Keep the soil moist but not soggy. Overwatering can cause root rot and slow development.
Once the plant matures, gradually reduce watering—this helps the fruits develop a sweeter flavor.
During the early growth stage, if your soil is already rich, additional fertilizer may not be necessary.
As the plant begins flowering and fruiting, it requires more nutrients:
Apply phosphate fertilizer near the base at three stages:
Right after planting
25 days after planting
Another 25 days after the second application
Use superphosphate or NPK fertilizer once a week during flowering and fruit development.
You may also add organic fertilizers such as compost tea or diluted fish emulsion for healthier, tastier fruits.
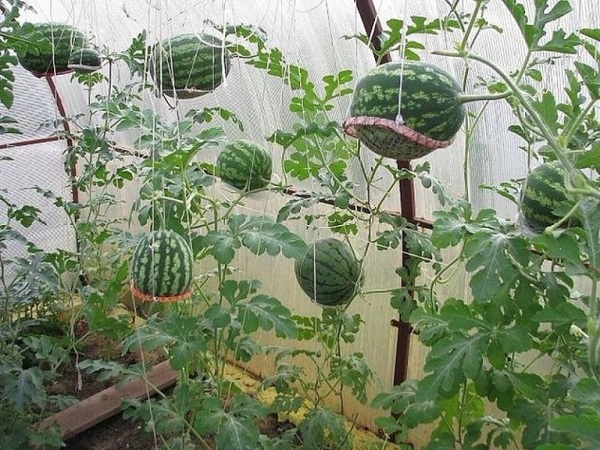
When growing in pots, making a trellis helps the watermelon vine grow upward, saving space and improving fruit quality.
You can start building the trellis about one month after planting.
Use wooden or bamboo stakes about 1–1.5 meters long. Arrange them around the pot and tie the tops together.
Gently guide the vines to climb the support structure.
Once the fruits start enlarging, place each one inside a support net and hang it securely on the trellis to prevent stems from breaking.
Trellises help:
Reduce pest exposure
Keep fruits clean and evenly shaped
Improve air circulation
Support healthier, sweeter fruit development
Because of their sweetness, watermelons easily attract insects and rodents.
Use barriers, nets, or light mesh covers to protect your plants early on. Regularly check for pests like aphids, beetles, and worms, and remove them promptly.
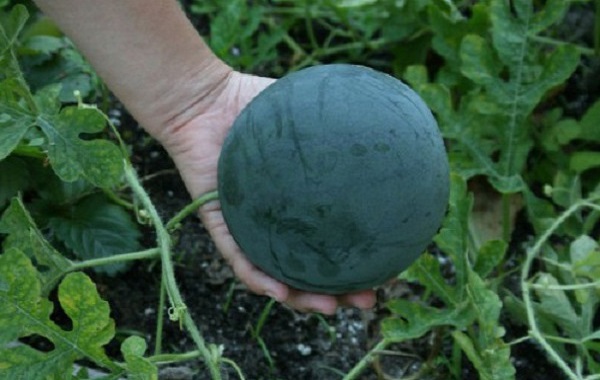
Watermelons are usually ready for harvest after about 3 months of growth.
To determine if your fruit is ripe:
Tap it gently—ripe watermelons produce a deep, hollow sound.
Check the tendril nearest the fruit’s stem; if it is dry and brown, the fruit is ready.
Observe the underside: a ripe watermelon has a creamy yellow patch where it rested.
Use scissors to cut the stem cleanly.
A well-cared-for potted watermelon plant typically produces 3–4 fruits per pot.