Never Ever Say These 4 Things at a Funeral — No Matter the Situation
When it comes to funerals and expressions of sympathy, your words don’t need to be profound or poetic.
Facts 20/08/2025 16:15
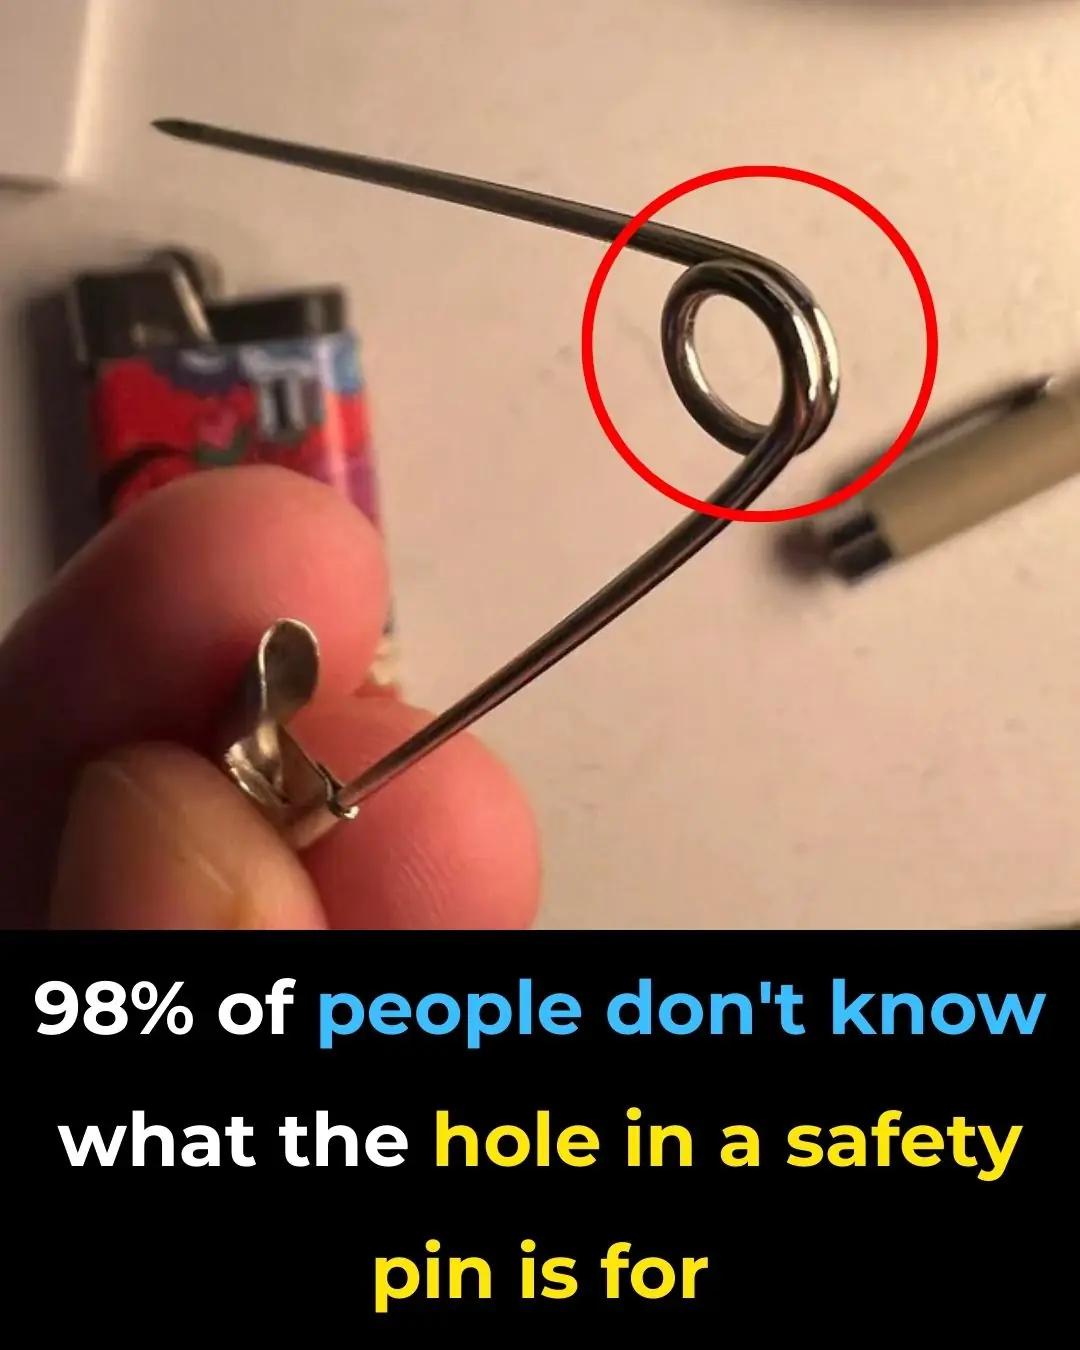
You’ve probably used a safety pin countless times, but have you ever wondered about that little hole near the clasp? It’s not a random design quirk - this tiny detail actually makes sewing, threading, and everyday fixes much easier than you think.
Why That Little Hole Exists
That small hole on the clasp end of a safety pin might look insignificant, but it’s a clever design element with a real function. Its main purpose is to serve as an anchor point when you’re threading items like elastic bands, ribbons, or drawstrings through fabric tunnels such as waistbands, hoodies, or pillow covers.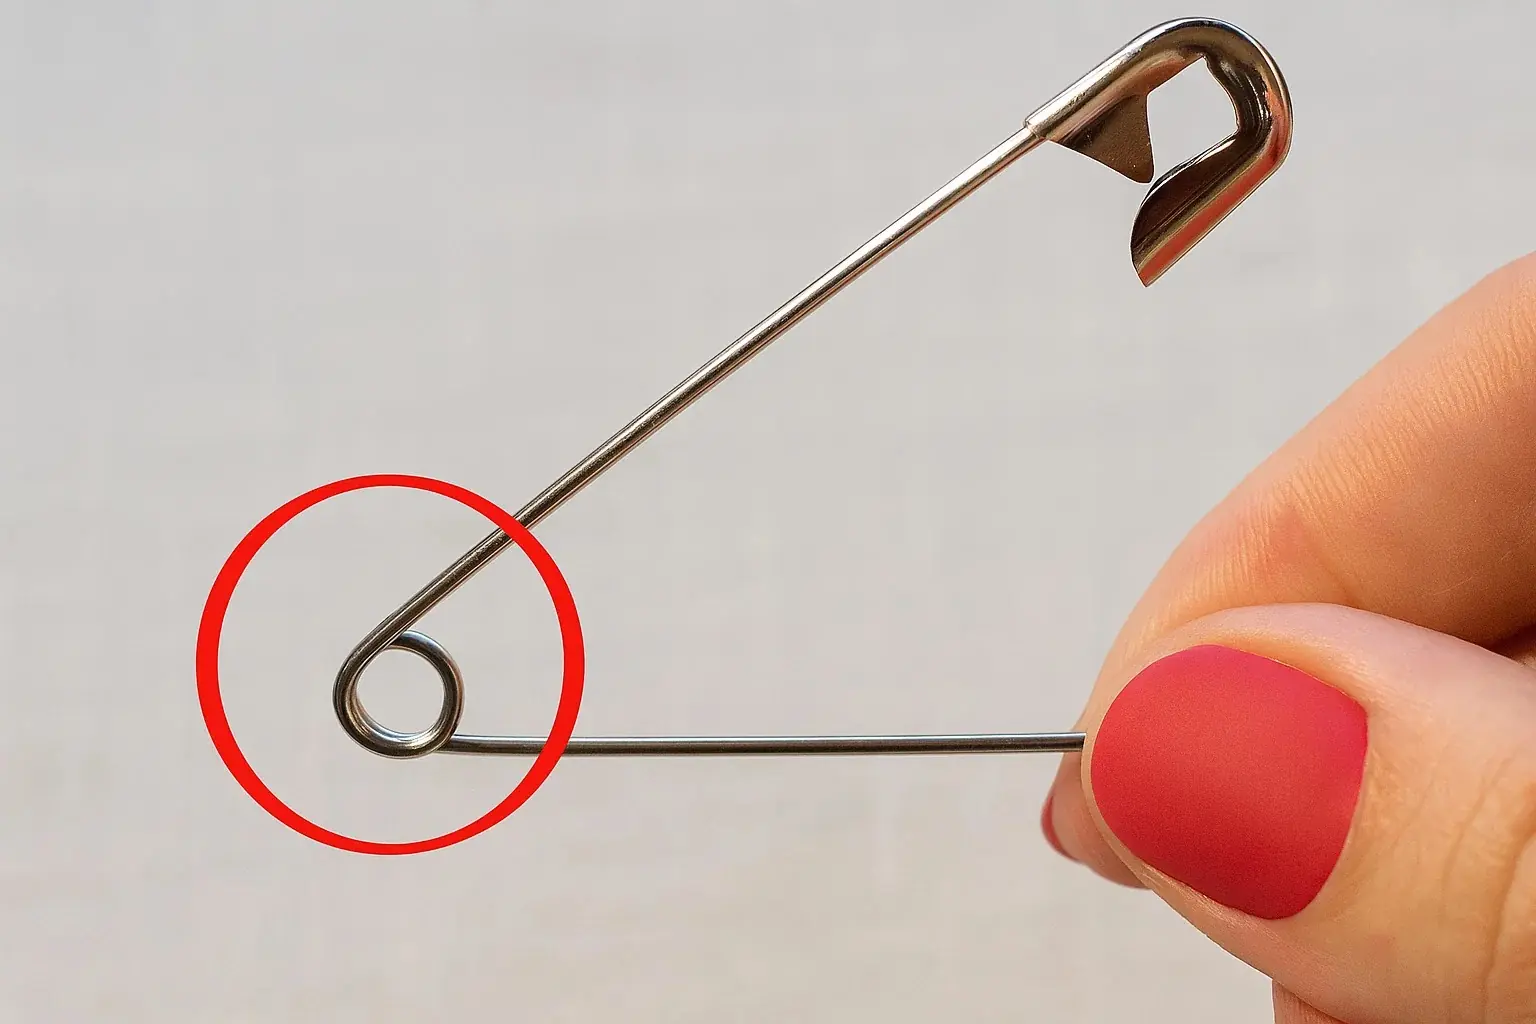
Here’s how it works step by step:
This small feature saves time, prevents frustration, and makes the whole process smoother. Without it, you risk losing the pin inside the fabric and struggling to get it back out.
In short:
Once you start using this hole the way it was intended, you’ll realize how practical and ingenious such a tiny detail can be.
Timeless Sewing Tricks Worth Reviving
Even though modern tools exist, some old-school sewing hacks are so clever that they’re still worth using today. Here are a few that can make your projects easier, cleaner, and more professional-looking:
The Bottom Line
That tiny hole in a safety pin isn’t just decoration - it’s proof that even the simplest everyday tools can hide smart design secrets. Combine it with timeless sewing tricks, and you’ll make your stitching projects easier, stronger, and more polished than ever.
Next time you pick up a safety pin, remember - you’re holding more than just a piece of metal. You’re holding a centuries-old tool packed with clever design and hidden possibilities.
When it comes to funerals and expressions of sympathy, your words don’t need to be profound or poetic.

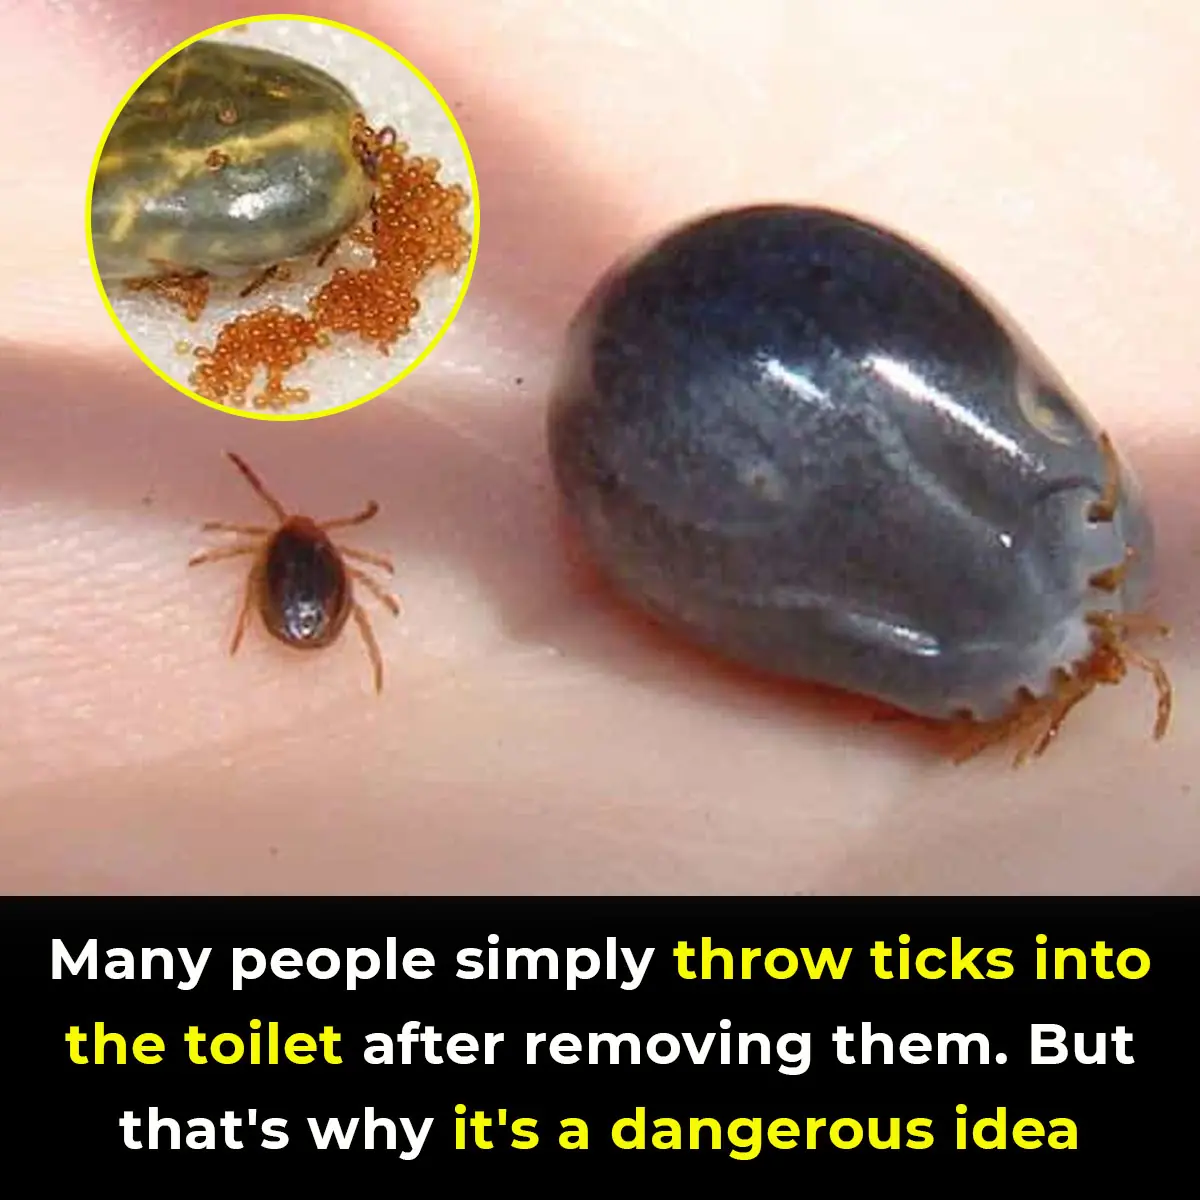

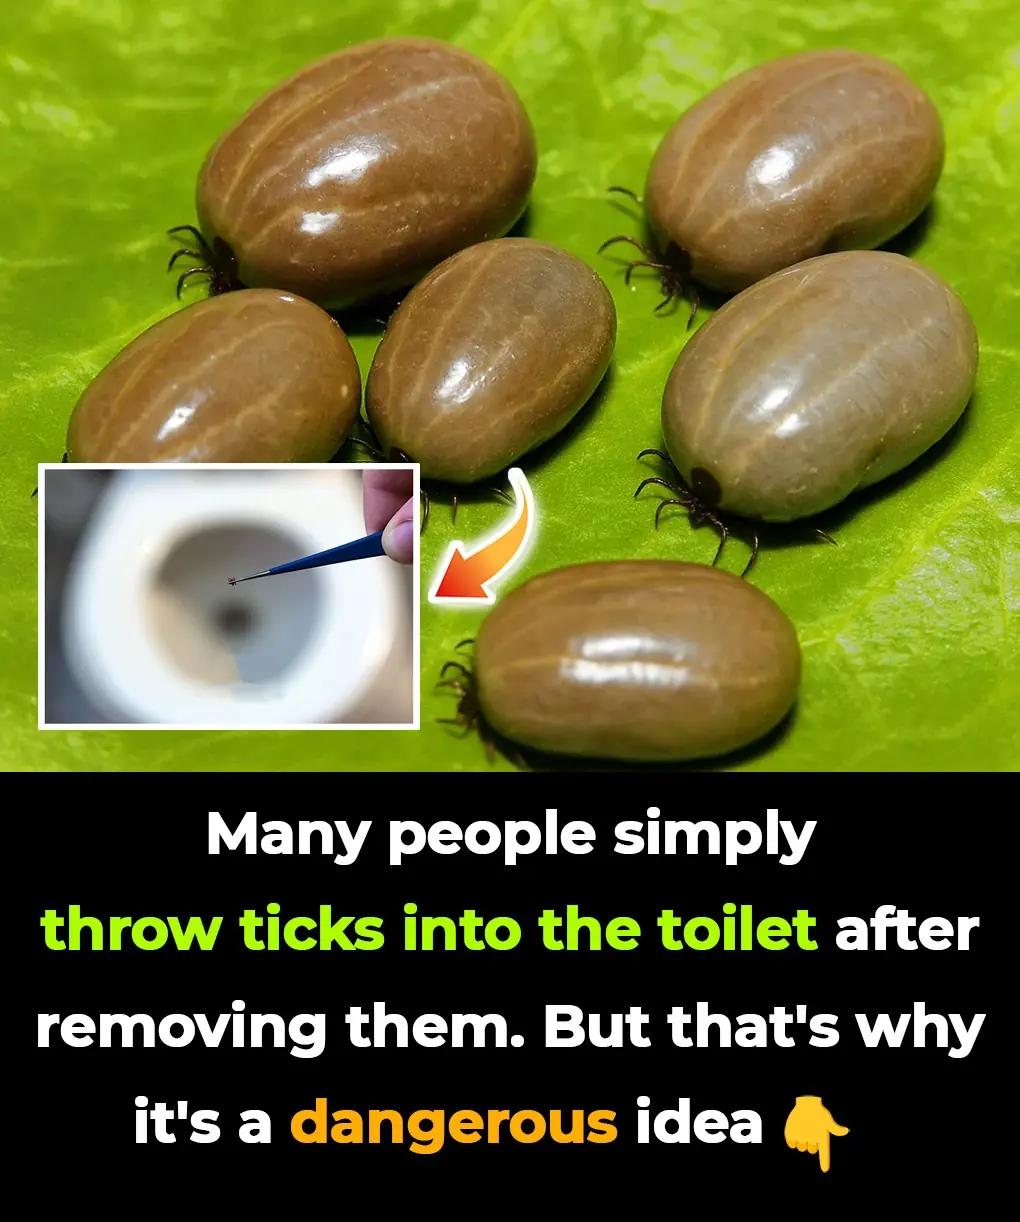
Ticks may be small, but their impact on human and pet health can be enormous.
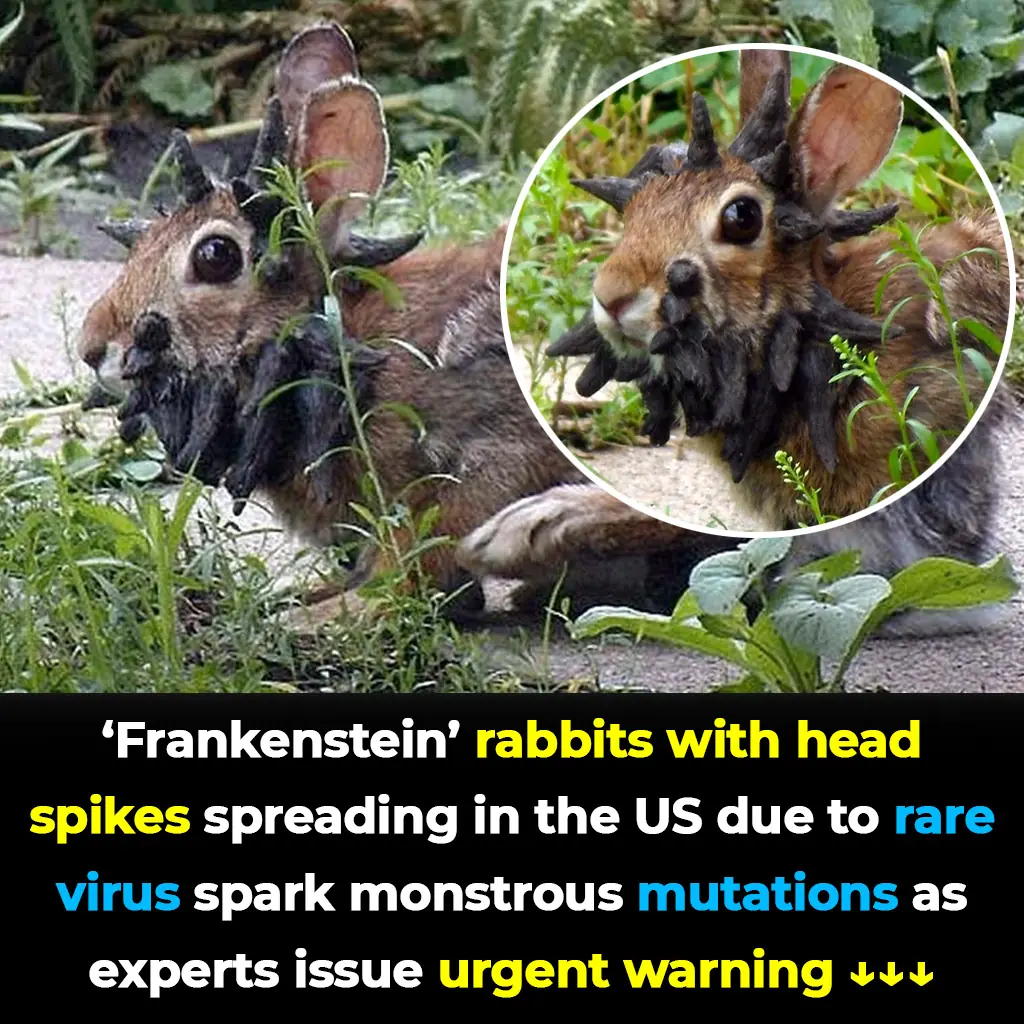
Although they may look frightening or pitiful, they remain a natural example of how viruses can drastically alter an animal’s appearance.

If you love solving puzzles and challenges, this viral hidden words image is just for you!


A 33-year-old woman from Colorado was clinically d:ead for eight minutes—yet she insists she never lost awareness and discovered that death is only an illusion. Her extraordinary account challenges science, spirituality, and everything we think we know


Black butterflies carry meanings that are as mysterious as they are beautiful.


When it comes to funerals and expressions of sympathy, your words don’t need to be profound or poetic.